Tuesday, April 26, 2011

Kitchen Container Garden

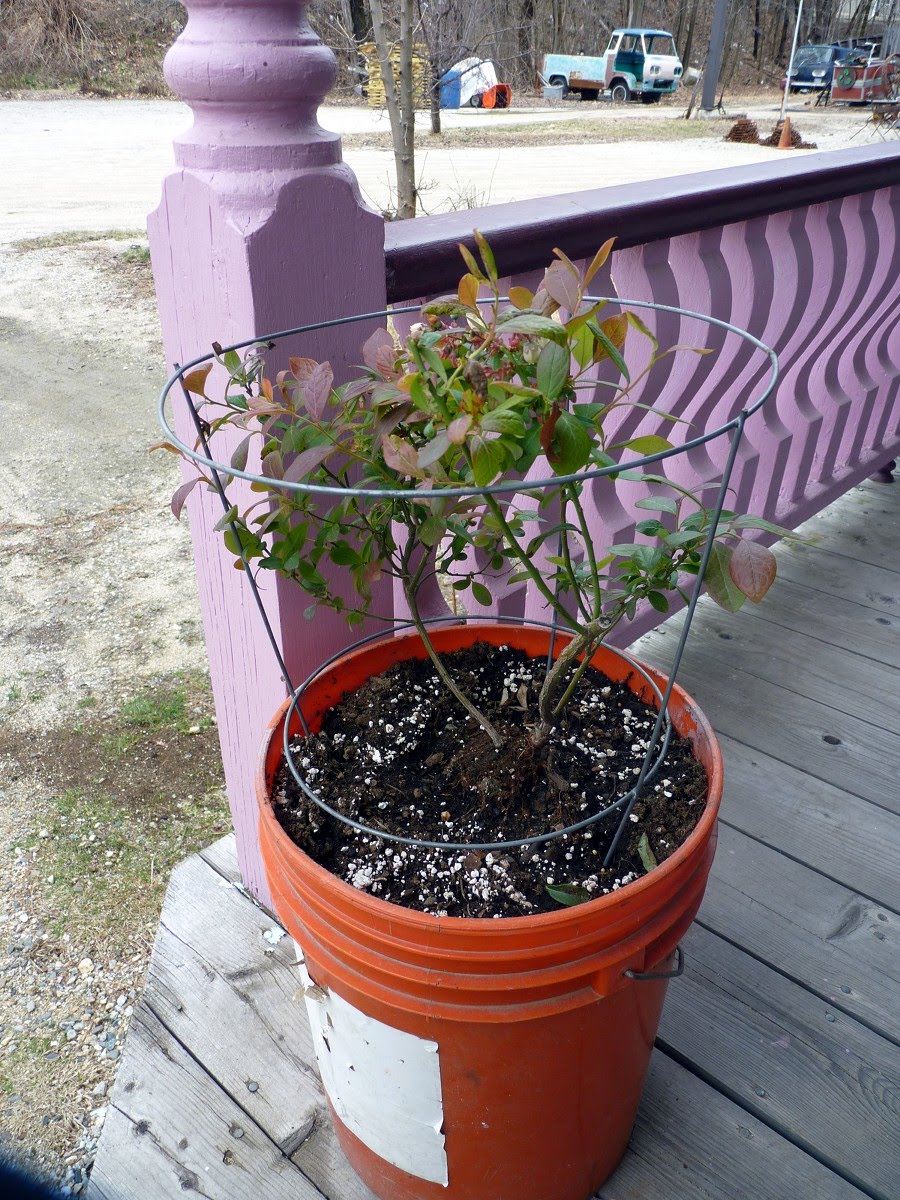
Blueberry bush, will need a
bigger container in the future
I love gardens. My parents have the most gorgeous flower gardens and a big vegetable garden every year. Unfortunately I live in an apartment building and there's isn't much of a yard here. What I do have though is a big porch I share with two other apartments (only one of which is occupied right now) and a small area in front of it where I can have a container garden. My landlords have been really nice about the whole thing and let me drill holes in the porch to hang a couple planters.

I bought this wonderful book recently Bountiful Container which is all about growing foods in containers, it covers vegetables, herbs, and edible flowers. While I like flowers I'm really more interested in growing my own food.

Tomato seedlings. I'm not actually going to plant so many,
the extras are more my parents.

It's still April and here in Maine that means that the danger of frost isn't yet past so I have all but my hardiest plants started indoors. I look forward to later this summer when I have lots of delicious food just a quick walk downstairs.

Just as a note, ALL container gardening regardless of the type of container is harder to keep watered than a regular garden. Using a potting soil with peat and either vermiculite or perlite will help it dry out less, also I've added water beads to my potting soil for even more added water retention. If you aren't familiar with water beads (or water crystals) they are made from a water absorbing polymer, they start out small and hard but absorb a large amount of water to swell up into a squishy almost gel-like ball. They are fantastic for helping potting soil retain moisture.

First leaf on the strawberries
My favorite fresh summer vegetable (or technically fruit) is the tomato. For space reasons I've bought one of those Topsy Turvy Upside-Down Tomato Planter plus it was on sale for $5 (so was the Topsy Turvy Strawberry Planter I got at the same time). I'll write more about my experience with these planters later this summer when I see how they do. I've grown both plants before with success so I know what to expect and what constitutes how the plants normally behave versus what might be due to the planters.

Also in my hunt for planters I found a window bow still planter made to fit over porch and deck railings. This is so perfect to go under my hanging planters to catch water runoff so it doesn't make a mess on the porch. The added benefit is that I used it to plant mesclun mix. What is mesclun? Well to quote that font of all knowledge known as Wikipedia:

Salad box, just planted so no sprouts ye
"Mesclun is a salad mix of assorted small, young salad leaves which originated in Provence, France. The traditional mix includes chervil, arugula, leafy lettuces and endive in equal proportions."

In other words it's ready to go salad mix. Most salad type greens have pretty shallow roots so a box like this works well. I've started this inside but by the time the seeds have sprouted so I can thin out the seedlings it will the past frost danger and it will take up it's abode on the porch rail.

Nasturtiums and bush Sugar Snap Peas
The next addition to my garden is waiting on a planter from my parents before it goes outside, I'll be picking it up possibly this weekend and if not then next weekend. It will house my bush sugar snap peas, nasturtiums, and some of my herbs. I've planted six but I'll probably only plant two and give the rest to my parents (along with all my other extra plants, it's a good trade for the planter, all the free eggs I get from their hens, and the corn, green beans, and cucumbers from their garden that I can't grow here). Nasturtiums, aside from being really beautiful flowers, are also edible and are great in salads. My garden is about food first and beauty second.

Lastly there are my herbs. I have them all started in  pots in my window right now. The dill and spearmint will be staying in their big pots for the summer, the rosemary when it's big enough will be transplanting to it's own pot (since it's not an annual I want to be able to bring it indoors in the winter) the rest of the annual herbs will be transplanted out of their little pots and into a big planter once they are a good size. I then plan to plant more of them in the small pots in the late summer so I have some herbs indoors through the winter. Why not keep them all indoors? Well they just don't grow as well in my window as they will outside, just not enough direct sunlight. I'm willing to put up with that in the winter when fresh herbs are so expensive to buy in the store but there's no good reason to in the summer.

Dill and Spearmint
For herbs I'm growing: basil, oregano, thyme, sage, cilantro, parsley, rosemary (won't be big enough this year for harvesting), dill, and spearmint. I love cooking with fresh herbs but they are pricey and don't keep long so growing them is really great, I can cut what I need right before cooking.

So this is my pretty ambitious gardening project and I plan to post the occasional update about how it's going and what great foods I'm making with my produce.

Tuesday, February 15, 2011

Weekend Stock

I call this "Weekend Stock" because it does take about 8 hours or so to make. Don't worry though, the actual prep time is closer to 30 minutes and is very easy, the other 7 hours and 30 minutes are letting the stock simmer on the stove. You should never leave a stove completely unattended so you can't put the stock on and leave for work however feel free to watch tv, clean, do homework, or play with your kids while it cooks.

Equipment:
1 Stock pot (I have an 8 quart one)
1 Mesh strainer
Ladel
Large bowl for straining the stock into
Freezer safe storage bowls

Fill your stock pot between 1/2 and 2/3 full of water (depends on how much finished stock you want and the size of your pot). Throw in your stock ingredients (roast raw meat/bones first if you'd like a richer stock)  and cook for about 7 hours or so. Check periodically to make sure the pot isn't boiling down too much, if it gets to be less than 1/2 the initial amount of water, add some more. When your stock is done, strain it into a large bowl through a fine mesh strainer to remove all the chunks.

If you made vegetable stock you can transfer the stock into smaller storage bowls now (or wait until it cools) and freeze any you aren't going to use within a few days. For meat based stock, allow it to cool in the fridge for a couple hours so the fat will solidify on the surface of the stock. If you have a very gelatinous stock (good for you! that's the best kind) you'll need to warm it up a little bit in a microwave or on the stove before you can transfer it to storage bowls. Freeze any stock you won't be using, refrigerated stock will only last about a week.

I haven't specified what to make your stock from. This is entirely up to you but for around a gallon of finished stock you should have at least a pound of stuff. What sort of stuff?

For vegetable stock I use about 1/2 a medium onion and a couple cloves of garlic, a few carrots and stalks of celery and then any other non-starchy veggies you have lying around (corn, green beans, peas, zucchini, tomatos, etc.) starchy vegetables like potatoes aren't very good for stock. This is a great way to use up fresh veggies that are past their prime and those leftover partial bags of frozen veggies that seem to lurk in the back of the freezer. If you like you can also throw in dried or fresh herbs if you have them. I avoid adding salt to stock, I can add it later if I need to but it's hard to remove too much salt.

For meat stock: Again use the onion and garlic along with any other aromatic veggies you have lying around like celery. Then add about a pound of animal bits, try for a good mix of meat and bones. I generally buy whole cut up chickens at the grocery store (only about 50 cents more than a whole chicken and I don't have to cut it up) which includes the neck and giblets. I save up these pieces in the freezer along with the bones from the chicken breasts after I've cut the meat off (either cooked or raw doesn't matter). When I have enough saved up I make chicken stock. The day after Thanksgiving is also good if you've made a turkey, just pick the good meat off the carcass for and throw everything else in the stock pot (same works with any other poultry, chicken, duck, goose, even cornish game hens though you would need several carcasses). For beef/pork/lamb stock you can buy soup bones at the store or use leftover bones from ribs and other bone in cuts of meat.

Monday, March 29, 2010

First Dinner in my Apartment

So I've moved and it feels great to finally be on my own. To celebrate I cooked my first dinner in the new apartment (actually my second dinner here but friends cooked for me last night). I made pan seared salmon and a salad with homemade vinaigrette.

Salmon
This was a roughly 4 ounce piece of fish (half an 8 ounce fillet I cut in half, froze the remaining half for another night). Coated it generously on both sides with olive oil, seasoned with salt, pepper, and a little freshly squeezed lemon juice. Cooked it in a non-stick pan for 3 minutes on each large side and 30 seconds each on the ends. Let sit under aluminum foil for 3-4 minutes while dishing out the salad.


Red wine vinaigrette
In a plastic squeeze bottle (of the type used for ketchup, salad dressing, etc) mix 2 tablespoons red wine vinegar, 6 tablespoons extra virgin olive oil, 1/8 teaspoon each of ground yellow mustard, dill seed, and minced garlic.This is a very small batch, double or triple it if you are serving multiple people. I like to make small amounts of vinaigrette like this that last me 2-3 days so then I can switch to a new combination of flavors.

Monday, March 15, 2010

Pi Day Tart

Been a long time since I've updated this blog. I've been busy and it's hard to remember to write posts when I'm cooking for 4 people however this may change soon as I may be moving into my own place soon.

March 14 (3.14) is Pi Day. In celebration I made this nice rustic berry tart. Since this was a thrown together recipe the measurements are approximate.

Ingredients:
  • 1 frozen pie crust thawed, you can of course use homemade but I hate making pie crust.
  • 2 cups berries of your choice, I used a mix of frozen strawberries, blackberries and blueberries, allow to thaw if you are using frozen. Drain excess juices that came out during thawing.
  • 1/4 cup sugar, I don't like a really sweet tart, use 1/2 cup if you like it sweeter.
  • 1/3 cup jam or jelly, I used orange marmalade to keep with the less sweet theme, apricot or apple would be nice too.
  • 1/2 cup crushed ginger snaps. Graham crackers would probably also work.
Steps:
  1. Preheat oven to 400 degrees. Place pie crust in pie plate or on a sheet pan doesn't matter for this recipe (use some parchment paper or grease it to keep the tart from sticking).
  2. Mix the berries, sugar, and half the cookie crumbs in a bowl, let sit 10 minutes.
  3. Pour berries into middle of the crust, spread evenly to 2 inches from the edge. Microwave the jam for about 15-30 seconds to loosen it up a little, drizzle over the berries.
  4. Fold edges of the crust in and over the berries (see picture).
  5. Sprinkle the rest of the cookie crumbs over the top of the tart.
  6. Bake 40 minutes or until crust is golden brown and delicious.
  7. Allow to cool before cutting and serving.

Sunday, October 25, 2009

Roasted Tomato Soup

Here's one of those recipes based on a classic that I've modified. Classically roasted tomato soup would be done with fresh tomatoes but good fresh tomatoes are hard to come by in Maine for most of the year so I've used canned tomatoes. I've also added my own twist with roasted sweet red peppers.

Ingredients:
  • 2 14oz cans of tomatoes, diced or whole
  • 1/2 roasted sweet red pepper (the kind in a jar, use fresh if you have it but I didn't)
  • Olive oil
  • 1 clove garlic
  • Sliver of onion (I'm not sure how much, it was about an 1/8 inch slice off the half onion in my fridge)
  • 1/2 cup chicken stock
  • Italian seasoning
  • Kosher salt
  • Ground black pepper
  • Bay leaf
Directions:
1: Drain the cans of tomatoes, reserving liquid for later.
2: Lay tomatoes, onion, and garlic on a baking sheet, drizzle with olive oil. Cut tomatoes in half if you are using whole canned tomatoes
3: Bake at 400 degrees for 15 minutes or until caramelized
4: Combine reserved tomato juice and chicken stock in your soup pot.
5: Place tomatoes, onion, garlic, and roasted peppers in your food processor and blend until at your preferred level of smoothness (I like a little chunky).
6: Add tomato mixture to your soup pot. Add the bay leaf and season with the Italian seasoning, salt, and pepper to taste.
7: Bring to a boil, reduce to medium and simmer about 10 minutes so the flavors meld together.

Served with some nice crusty toasted bread it's hearty but still very healthy.

Tuesday, October 20, 2009

Quick and Easy - Pesto Chicken

Here's a simple recipe to put together. It's what I made for dinner tonight when faced with only nothing planned and a package of chicken. I ended up using less than half a small jar of pesto, so it's good if you have some leftover in the fridge.

Ingredients:
Jar of pesto
Chicken pieces of choice

Directions:
1: Place chicken in shallow baking dish.
2: Spoon pesto over the chicken.
3: Bake at 350°F until done, this will depend on the cut and weight of the pieces, here's a chart or better yet use a probe thermometer to cook until the internal temperature is 165°F.
4: Share and enjoy.

Tuesday, October 13, 2009

Split Pea Soup: Delicious Comfort Food


Pea soup in one of those wonderful, hearty foods that make you feel really good on a cold wet day. It also has the benefit of being very cheap and easy to make in a crock pot (even cheaper is the ham is from leftovers). This dish does take several hours to cook but being a crock pot recipe you can throw it together in the morning and just leave it simmering on low all day, it doesn't need constant attention.

I saved the bone form the ham I made last week to make this soup, it's a great way to use up leftover ham.

Ingredients:
  • 2 cups dried split peas
  • 1 ham bone, and/or leftover ham
  • 2 cups chicken stock
  • 2 tablespoons lemon juice
  • 1/4 cup diced onion
  • tablespoon butter
  • 1 clove garlic minced
  • 4 cups water
  • Bay leaf
  • Italian seasoning
  • Salt
  • Pepper
How to make it:
1: Saute the onion and garlic in the butter until transluscent.
2: Add peas, ham, stock, water, lemon juice, and bay leaf to your crock pot.
3: Season with Italian seasoning mix, salt,  and pepper to taste
4: Simmer on low 6-8 hours or high for 3-4 hours until the peas break down and the soup thickens (actual time may vary depending on your crock pot, however pea soup can't really be overcooked so err on the side of more time)
5: Serve with thick slices of bread or fresh biscuits.

Save a little  time:If you need to save some cooking time try this. Soak the peas overnight (or while your at work) in about 6 cups of water. Drain excess water before using. Reduce the amount of water you add to the crock pot to 3 cups. This can cut the cooking time by about 1/3.

Variations:
1: Try making this with turkey ham or your favorite smoked sausage
2: This recipe can easily be made vegetarian as well. Leave out the ham, saute the onion and garlic in olive oil, and swap the chicken stock for vegetable. It's just as delicious.
3: If you don't like sauteing the onion and garlic you can substitute some onion and garlic powder instead but you won't get as rich a taste.